源码仓库 GitHub - darven-cs/handwrit-code: 手写源码
实现过程 1.创建框架 主要方法就是下面三个
1
2
3
4
5
6
7
8
9
10
11
12
13
14
15
16
17
public class MyThreadPoolExecutor {public void execute (Runnable runnable) {public void shutdown () {public void shutdownNow () {
我们通过execute放入我们的任务,然后通过线程池对象自己管理
怎么执行这个Runnable任务呢,我们通过Thread类来创建线程,然后调用start方法执行。
1 2 3 4 5 6 public void execute (Runnable runnable) {Thread thread = new Thread (runnable);
如上代码我们只会将每个任务进来之后都创建一个线程,然后执行,而线程一旦执行完成,就会自动销毁,达不到线程复用效果。
2.单线程复用 这时候我们可以想到用一个容器(集合)去存储,任务,然后循环执行每个任务是不是就可以达到线程复用效果,因此我们进行实践。
1
2
3
4
5
6
7
8
9
10
11
12
13
14
15
16
17
18
19
20
21
22
23
24
25
26
27
28
29
30
31
32
33
34
35
36
public class MyThreadPoolExecutor {public MyThreadPoolExecutor () {new ArrayList <>();public void execute (Runnable runnable) {private void threadRun () {new Thread (()->{while (true ){if (!runnableList.isEmpty()){0 );public void shutdown () {public void shutdownNow () {
通过上面代码,我们就简单的实现了单线程的复用,可以发现我们是通过new Thread进行创建线程的,然后一直循环这个线程。
但是我们将面临两个问题
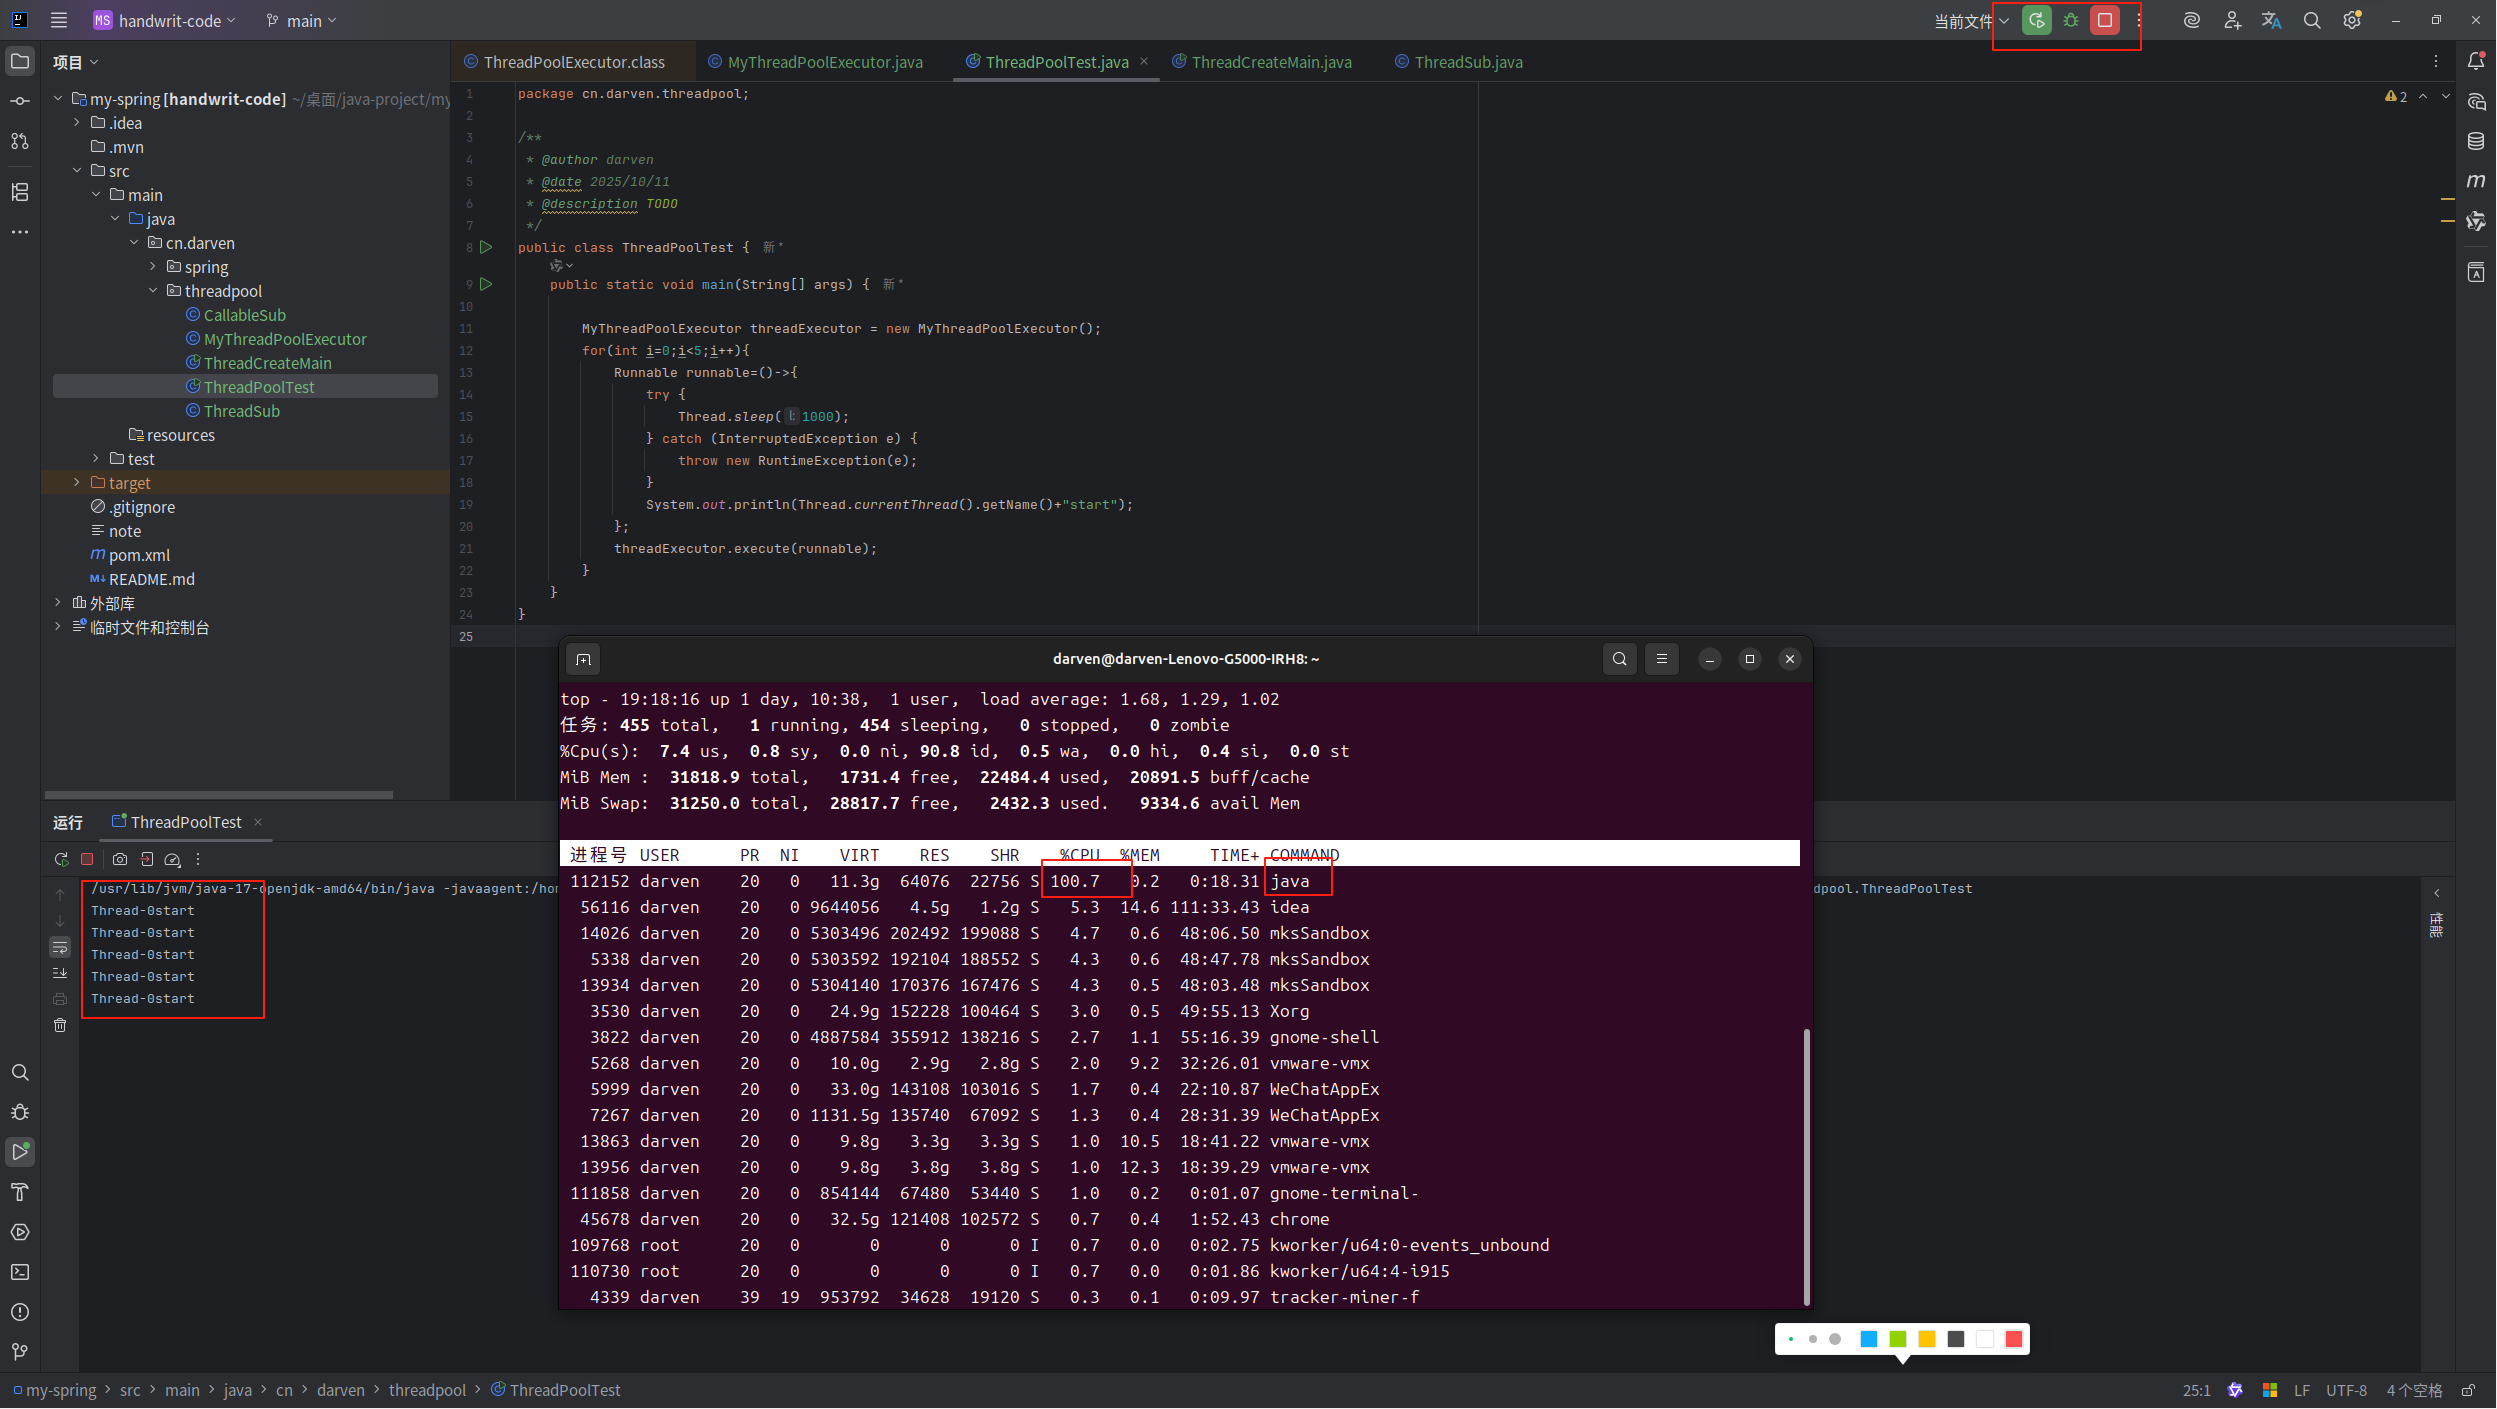
任务执行完成之后,while循环一直占用CPU,导致CPU飙升
没实现多线程,目前还是单线程
通过下面截图我们可以知道,while(true)是多么严重,CPU飙升到100,如果在开发环境,可能其他任务很难执行 。
怎么解决这个没有线程之后,这个就涉及操作系统的线程/进程周期,如果我们可以将其线程阻塞,等待新的任务进入,然后继续运行,这里我们就引入了阻塞队列。
3.阻塞队列解决while循环导致的CPU问题 下面是改造好的样子
1
2
3
4
5
6
7
8
9
10
11
12
13
14
15
16
17
18
19
20
21
22
23
24
25
26
27
28
29
30
31
32
33
34
35
36
37
38
39
40
41
42
43
44
public class MyThreadPoolExecutor {private final BlockingDeque<Runnable> workQueue;public MyThreadPoolExecutor (BlockingDeque<Runnable> workQueue) {this .workQueue = workQueue;private void runTask () {new Thread (() -> {while (true ) {try {Runnable task = workQueue.take();catch (InterruptedException e) {break ;public void execute (Runnable runnable) {public void shutdown () {public void shutdownNow () {
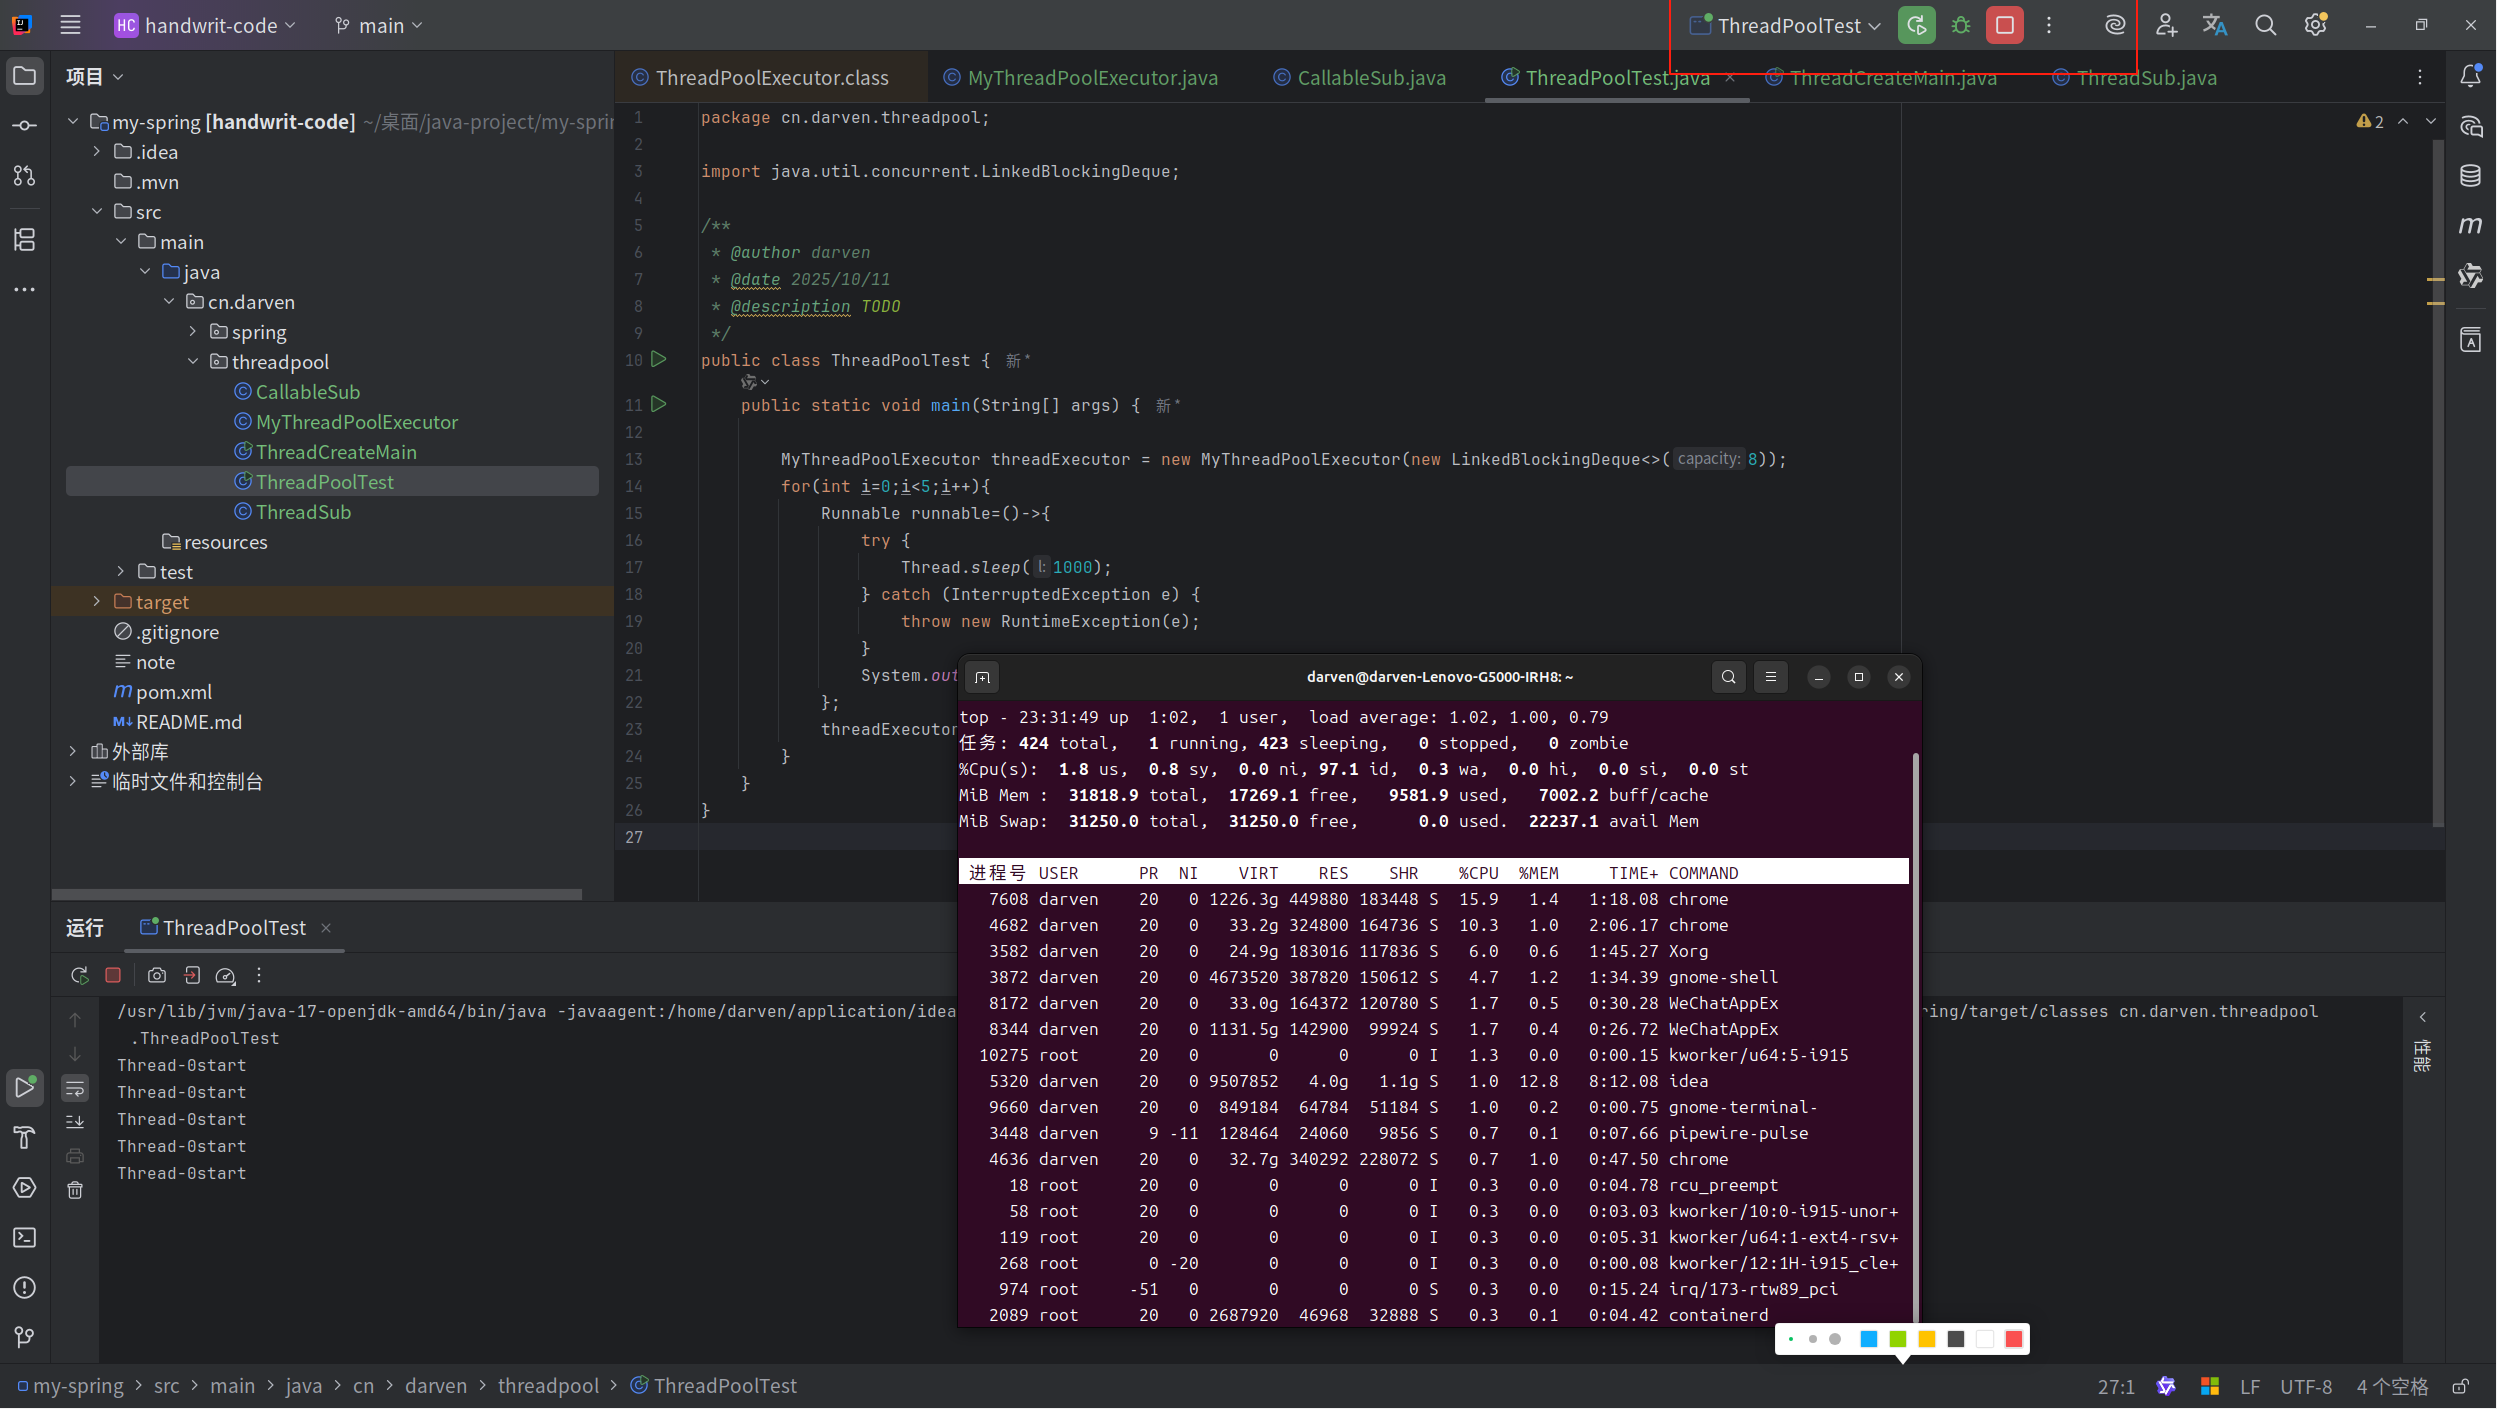
输出结果
就不出现CPU100%啦。
4.核心线程实现 这时候我们要解决第二个问题,既然是线程池,我们就需要多个线程,这时候我们怎么实现呢。既然是多个,那么我们就用一个容器装起来,所以我们将Thread用List装起来,但是我们不能一直创建,所以会有一个参数
corePoolSize核心线程数,我们是通过放入任务,就给他创建新的线程,直到核心线程数的时候,就开始一直复用阻塞队列的任务。
话不多说,我们直接实现,我们需要将启动方法包装一下。
同时我们这里还有一个问题就是创建核心线程数的时候会出现并发问题,出现创建超过核心线程的情况,所以我们需要考虑这个问题。Java的线程池是通过以下机制实现的。
原子性操作
使用 AtomicInteger 等原子类来维护线程池状态和工作线程数量
通过 CAS (Compare-And-Swap) 操作保证计数器更新的原子性
锁机制
内部使用 ReentrantLock 保护关键共享资源
通过锁来控制对 workers 集合的访问,防止并发修改
队列同步
使用 BlockingQueue 作为任务队列,天然支持线程安全
生产者-消费者模式,自动处理线程间的同步问题
我们这里先简单使用synchronized关键进行加锁。
1
2
3
4
5
6
7
8
9
10
11
12
13
14
15
16
17
18
19
20
21
22
23
24
25
26
27
28
29
30
31
32
33
34
35
36
37
38
39
40
41
42
43
44
45
46
47
48
49
50
51
52
53
54
55
56
57
58
59
60
61
62
63
64
65
66
67
68
69
70
71
72
73
74
75
76
77
78
package cn.darven.threadpool;import java.nio.charset.CoderResult;import java.util.ArrayList;import java.util.List;import java.util.concurrent.BlockingDeque;import java.util.concurrent.ThreadPoolExecutor;public class MyThreadPoolExecutor {private final BlockingDeque<Runnable> workQueue;private final int corePoolSize;public MyThreadPoolExecutor (int corePoolSize, BlockingDeque<Runnable> workQueue) {this .workQueue = workQueue;this .corePoolSize = corePoolSize;private List<CoreThread> coreThreadList = new ArrayList <>();public synchronized void execute (Runnable runnable) {if (coreThreadList.size() < corePoolSize) {CoreThread coreThread = new CoreThread (runnable);return ;public void shutdown () {public void shutdownNow () {class CoreThread extends Thread {private Runnable firstCommand;public CoreThread (Runnable command) {this .firstCommand = command;@Override public void run () {if (firstCommand != null ) {while (true ) {Runnable runnable = null ;try {catch (InterruptedException e) {throw new RuntimeException (e);
测试类:
1
2
3
4
5
6
7
8
9
10
11
12
13
14
15
16
17
18
19
20
21
22
23
24
25
26
27
package cn.darven.threadpool;import java.util.concurrent.LinkedBlockingDeque;public class ThreadPoolTest {public static void main (String[] args) {MyThreadPoolExecutor threadExecutor = new MyThreadPoolExecutor (3 ,new LinkedBlockingDeque <>(8 ));for (int i=0 ;i<5 ;i++){try {1000 );catch (InterruptedException e) {throw new RuntimeException (e);"start" );
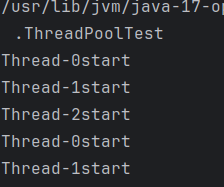
输出结果:
我们可以看到三个线程在执行,超出的线程会放在阻塞队列,然后依次消费。
5.最大线程数/空闲时间/单位 背景:为了应对”应对突发任务峰值,同时防止线程无限制创建导致系统崩溃
我们引入最大线程数=核心线程数+非核心线程数
既然是非核心,那么我们只要应对完任务峰值之后,就可以进行销毁啦,因此我们需要一个空闲时间,然后给他分配时间单位。
我们已经实现了核心线程类,还需要创建非核心线程类。
1
2
3
4
5
6
7
8
9
10
11
12
13
14
15
16
17
18
19
20
21
22
23
24
25
26
27
28
29
30
31
32
33
34
35
36
37
38
39
40
41
42
43
44
45
46
47
48
49
50
51
52
53
54
55
56
57
58
59
60
61
62
63
64
65
66
67
68
69
70
71
72
73
74
75
76
77
78
79
80
81
82
83
84
85
86
87
88
89
90
91
92
93
94
95
96
97
98
99
100
101
102
103
104
105
106
107
108
109
110
111
112
113
114
115
116
117
118
119
120
121
122
123
124
125
126
127
128
129
130
131
132
133
134
135
136
137
138
package cn.darven.threadpool;import java.nio.charset.CoderResult;import java.util.ArrayList;import java.util.List;import java.util.concurrent.BlockingDeque;import java.util.concurrent.ThreadPoolExecutor;import java.util.concurrent.TimeUnit;public class MyThreadPoolExecutor {private final BlockingDeque<Runnable> workQueue;private final int corePoolSize;private final int maximumPoolSize;private final long keepAliveTime;private final TimeUnit unit;public MyThreadPoolExecutor (int corePoolSize, int maximumPoolSize,int keepAliveTime,TimeUnit unit, BlockingDeque<Runnable> workQueue) {this .workQueue = workQueue;this .corePoolSize = corePoolSize;this .maximumPoolSize = maximumPoolSize;this .keepAliveTime = keepAliveTime;this .unit = unit;private List<CoreThread> coreThreadList = new ArrayList <>();private List<NonCoreThread> nonCoreThreadList = new ArrayList <>();public synchronized void execute (Runnable runnable) {if (coreThreadList.size() < corePoolSize) {CoreThread coreThread = new CoreThread (runnable);return ;if (workQueue.offer(runnable)){return ;if (coreThreadList.size()+nonCoreThreadList.size()<maximumPoolSize){NonCoreThread nonCoreThread = new NonCoreThread (runnable);return ;public void shutdown () {public void shutdownNow () {class CoreThread extends Thread {private Runnable firstCommand;public CoreThread (Runnable command) {this .firstCommand = command;@Override public void run () {if (firstCommand != null ) {while (true ) {Runnable runnable = null ;try {catch (InterruptedException e) {throw new RuntimeException (e);class NonCoreThread extends Thread {private Runnable firstCommand;public NonCoreThread (Runnable command) {this .firstCommand = command;@Override public void run () {if (firstCommand != null ) {while (true ) {Runnable command = null ;try {if (command == null ) {break ;catch (InterruptedException e) {throw new RuntimeException (e);" 非核心线程销毁" );
测试代码:
1
2
3
4
5
6
7
8
9
10
11
12
13
14
15
16
17
18
19
20
21
public class ThreadPoolTest {public static void main (String[] args) {MyThreadPoolExecutor threadExecutor = new MyThreadPoolExecutor (3 ,6 ,5 ,new LinkedBlockingDeque <>(3 ));for (int i=0 ;i<9 ;i++){try {1000 );catch (InterruptedException e) {throw new RuntimeException (e);"start" );
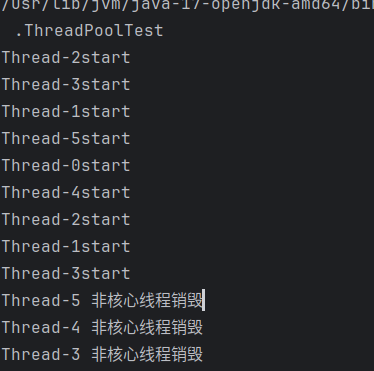
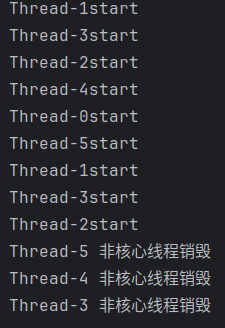
我们的测试类是设置最大线程数是6,然后核心线程数是3,阻塞队列是3,测试案例是9个任务,刚好能触发非核心线程的使用。
输出结果:
从结果可以看到创建了三个非核心线程,并且自动销毁。
6.拒绝策略 如果突发峰值超过阻塞的队列和最大线程数的设定会出现什么问题?
直接测试100个任务
1
2
3
4
5
6
7
8
9
10
11
12
13
14
15
16
17
18
19
20
21
public class ThreadPoolTest {public static void main (String[] args) {MyThreadPoolExecutor threadExecutor = new MyThreadPoolExecutor (3 ,6 ,5 ,new LinkedBlockingDeque <>(3 ));for (int i=0 ;i<100 ;i++){try {1000 );catch (InterruptedException e) {throw new RuntimeException (e);"start" );
结果
只会执行6+3=9个人物,剩下的会自动抛弃掉。
这时候我们会因为业务需要将超出的任务处理,这时候引进拒绝策略。这里经典使用策略模式,下面会讲Java内置的4种拒绝策略。作用:在系统过载时保护线程池和系统资源
创建接口RejectedExecutionHandler
1
2
3
4
5
6
7
8
9
10
11
12
13
14
15
16
17
18
19
20
21
22
23
24
25
26
27
28
29
30
31
32
33
34
35
36
37
38
39
40
41
42
43
44
45
46
47
48
49
50
51
52
53
54
55
56
57
58
59
public interface RejectedExecutionHandler {void rejectedExecution (Runnable var1, MyThreadPoolExecutor var2) ;public class AbortPolicy implements RejectedExecutionHandler {@Override public void rejectedExecution (Runnable var1, MyThreadPoolExecutor var2) {throw new RuntimeException ("Task " +var1+" rejected from " +var2);public class CallerRunsPolicy implements RejectedExecutionHandler {@Override public void rejectedExecution (Runnable var1, MyThreadPoolExecutor var2) {if (!var2.isShutdown()) {public class DiscardOldestPolicy implements RejectedExecutionHandler {@Override public void rejectedExecution (Runnable var1, MyThreadPoolExecutor var2) {if (!var2.isShutdown()){public class DiscardPolicy implements RejectedExecutionHandler {@Override public void rejectedExecution (Runnable var1, MyThreadPoolExecutor var2) {
线程池代码
1
2
3
4
5
6
7
8
9
10
11
12
13
14
15
16
17
18
19
20
21
22
23
24
25
26
27
28
29
30
31
32
33
34
35
36
37
38
39
40
41
42
43
44
45
46
47
48
49
50
51
52
53
54
55
56
57
58
59
60
61
62
63
64
65
66
67
68
69
70
71
72
73
74
75
76
77
78
79
80
81
82
83
84
85
86
87
88
89
90
91
92
93
94
95
96
97
98
99
100
101
102
103
104
105
106
107
108
109
110
111
112
113
114
115
116
117
118
119
120
121
122
123
124
125
126
127
128
129
130
131
132
133
134
135
136
137
138
139
140
141
142
143
144
145
146
147
148
149
150
151
152
package cn.darven.threadpool;import cn.darven.threadpool.reject.AbortPolicy;import cn.darven.threadpool.reject.RejectedExecutionHandler;import java.util.ArrayList;import java.util.List;import java.util.concurrent.BlockingDeque;import java.util.concurrent.TimeUnit;public class MyThreadPoolExecutor {private final BlockingDeque<Runnable> workQueue;private final int corePoolSize;private final int maximumPoolSize;private final long keepAliveTime;private final TimeUnit unit;private volatile RejectedExecutionHandler handler;private static final RejectedExecutionHandler defaultHandler=new AbortPolicy ();public MyThreadPoolExecutor (int corePoolSize, int maximumPoolSize,int keepAliveTime,TimeUnit unit, BlockingDeque<Runnable> workQueue,RejectedExecutionHandler handler) {this .workQueue = workQueue;this .corePoolSize = corePoolSize;this .maximumPoolSize = maximumPoolSize;this .keepAliveTime = keepAliveTime;this .unit = unit;this .handler = handler;private List<CoreThread> coreThreadList = new ArrayList <>();private List<NonCoreThread> nonCoreThreadList = new ArrayList <>();public synchronized void execute (Runnable runnable) {if (coreThreadList.size() < corePoolSize) {CoreThread coreThread = new CoreThread (runnable);return ;if (workQueue.offer(runnable)){return ;if (coreThreadList.size()+nonCoreThreadList.size()<maximumPoolSize){NonCoreThread nonCoreThread = new NonCoreThread (runnable);return ;this );public void shutdown () {public void shutdownNow () {public boolean isShutdown () {return false ;public BlockingDeque<Runnable> getQueue () {return workQueue;class CoreThread extends Thread {private Runnable firstCommand;public CoreThread (Runnable command) {this .firstCommand = command;@Override public void run () {if (firstCommand != null ) {while (true ) {Runnable runnable = null ;try {catch (InterruptedException e) {throw new RuntimeException (e);class NonCoreThread extends Thread {private Runnable firstCommand;public NonCoreThread (Runnable command) {this .firstCommand = command;@Override public void run () {if (firstCommand != null ) {while (true ) {Runnable command = null ;try {if (command == null ) {break ;catch (InterruptedException e) {throw new RuntimeException (e);" 非核心线程销毁" );
测试类
1
2
3
4
5
6
7
8
9
10
11
12
13
14
15
16
17
18
19
20
21
22
23
public class ThreadPoolTest {public static void main (String[] args) {MyThreadPoolExecutor threadExecutor = new MyThreadPoolExecutor (3 ,6 ,5 ,new LinkedBlockingDeque <>(3 )new AbortPolicy ());for (int i=0 ;i<100 ;i++){try {1000 );catch (InterruptedException e) {throw new RuntimeException (e);"start" );
输出结果:
我们可以看到直接抛出异常
7.线程池的关闭 线程池关闭有两种关闭方法,一个是拒绝任务加入,然后等待阻塞队列任务消费完关闭,一个是直接关闭
1 2 3 4 5 6 7 8 9 10 11 12 13 14 public void shutdown () {public void shutdownNow () {public boolean isShutdown () {return false ;
这里我们要了解一下java线程的中断机制
线程中断是 Java 中协作式终止线程的机制,核心不是 “强制杀死线程”,而是给线程发送一个 “中断信号”,线程可以根据自身逻辑决定是否响应这个信号(比如停止执行、继续运行等)。
中断的本质:线程有一个 “中断状态”(布尔值),Thread.interrupt() 方法会设置这个状态为 true;
中断的响应:当线程执行阻塞操作(如 Thread.sleep()、BlockingQueue.take()、Object.wait() 等)时,若中断状态被设置,会抛出 InterruptedException,同时清除中断状态(重置为 false);
线程的主动权:线程可以通过 Thread.isInterrupted() 检查中断状态,自主决定是否终止(比如在循环中判断,若中断则退出)。
也就是说这个中断只是一个信号,如果线程执行阻塞操作并且中断就会抛出中断异常,然后我们通过这个异常break异常就行啦。
1 2 3 4 5 6 7 8 9 10 11 12 13 14 15 16 17 18 19 20 21 22 23 24 25 26 27 28 29 30 31 32 33 34 35 36 37 38 39 40 41 42 43 44 45 46 47 48 49 50 51 52 53 54 55 56 57 58 59 60 61 62 63 64 65 66 67 68 69 70 71 72 73 74 75 76 77 78 class CoreThread extends Thread {private Runnable firstCommand;public CoreThread (Runnable command) {this .firstCommand = command;@Override public void run () {if (firstCommand != null ) {null ;while (!isShutdown || !workQueue.isEmpty()) {Runnable runnable = null ;try {catch (InterruptedException e) {break ; if (runnable != null ) {" 核心线程优雅退出" );class NonCoreThread extends Thread {private Runnable firstCommand;public NonCoreThread (Runnable command) {this .firstCommand = command;@Override public void run () {if (firstCommand != null ) {null ;while (true ) {Runnable command = null ;try {if (isShutdown && workQueue.isEmpty()) {break ;if (command == null ) {break ; catch (InterruptedException e) {break ; " 非核心线程优雅退出" );this );
优雅关闭
+拒绝接收新任务;
等待已提交的任务(包括正在执行的任务和队列中等待的任务)全部执行完成后,线程池再彻底关闭;
不中断正在执行的任务。
1 2 3 4 5 6 public void shutdown () {if (isShutdown) return ;true ;
立即关闭
拒绝接收新任务;
尝试中断所有正在执行的任务(通过interrupt())
清空任务队列,返回所有未执行的任务(让调用者自行处理)。
1 2 3 4 5 6 7 8 9 10 11 12 13 14 15 16 17 public List<Runnable> shutdownNow () {if (isShutdown) return new ArrayList <>();true ;for (CoreThread coreThread : coreThreadList) {for (NonCoreThread nonCoreThread : nonCoreThreadList) {new ArrayList <>();return unexecutedTasks;
8.总结 目前我们已经实现池的基本功能,不过还需要考虑线程安全问题,等我明天看看能不能研究一下,或者后面看看,线程安全/并发问题还是很重要得。
今天手写了这个源码框架,不一定和Jdk实现一样哈,只是思路是这么个思路,能熟悉线程池管理的流程,并且知道多线程的使用,线程池的核心参数等等,收获颇丰。
就这样啦,加纳!!!!
todo:实现线程安全的线程池
阻塞队列 1. 插入元素(往队列中添加元素)
方法
功能描述
阻塞性
特殊情况处理
适用场景
add(E e)插入元素,成功返回 true
非阻塞
队列满时抛出 IllegalStateException
需立即知道插入是否成功(不常用)
offer(E e)插入元素,成功返回 true,失败返回 false
非阻塞
队列满时直接返回 false
非阻塞场景,允许插入失败
offer(E e, long timeout, TimeUnit unit)插入元素,若队列满则等待指定时间
超时阻塞
超时后仍满则返回 false
允许有限等待的插入场景
put(E e)插入元素,若队列满则一直阻塞 ,直到队列有空间或线程被中断
无限阻塞
线程被中断时抛出 InterruptedException
必须插入成功的阻塞场景
2. 移除元素(从队列中获取并移除元素)
方法 功能描述 阻塞性 特殊情况处理 适用场景
remove()移除并返回队头元素
非阻塞
队列空时抛出 NoSuchElementException
需立即知道移除是否成功(不常用)
poll()移除并返回队头元素,队列空时返回 null
非阻塞
队列空时直接返回 null
非阻塞场景,允许获取失败
poll(long timeout, TimeUnit unit)移除并返回队头元素,若队列空则等待指定时间
超时阻塞
超时后仍空则返回 null
允许有限等待的获取场景
take()移除并返回队头元素,若队列空则一直阻塞 ,直到队列有元素或线程被中断
无限阻塞
线程被中断时抛出 InterruptedException
必须获取元素的阻塞场景
3. 检查元素(仅查看队头元素,不移除)
方法 功能描述 阻塞性 特殊情况处理 适用场景
element()返回队头元素(不移除)
非阻塞
队列空时抛出 NoSuchElementException
需立即查看,不允许空队列
peek()返回队头元素(不移除),队列空时返回 null
非阻塞
队列空时返回 null
非阻塞场景,允许队列为空
拒绝策略 1.触发条件 线程池流程:
核心线程->阻塞队列->非核心线程
核心线程数已满+阻塞队列已满+非核心线程数已满
2.4种拒绝策略 1. AbortPolicy(默认策略):直接抛出异常,阻止系统正常运行
行为 :当任务被拒绝时,直接抛出 RejectedExecutionException 异常,中断任务提交流程。源码 :
1
2
3
4
5
public static class AbortPolicy implements RejectedExecutionHandler {
适用场景 :需要明确知道任务被拒绝的场景(如关键业务,不允许任务丢失,需人工干预)。缺点 :会中断当前任务提交的线程,可能导致业务流程中断。
2. CallerRunsPolicy:让提交任务的线程自己执行任务,起到 “限流” 作用
行为 :当任务被拒绝时,由提交任务的线程(调用者线程)亲自执行该任务,而非线程池中的线程。源码 :
1
2
3
4
5
6
7
public static class CallerRunsPolicy implements RejectedExecutionHandler {
适用场景 :并发量不大、任务执行时间短的场景(如普通业务接口)。优点 :
无需额外线程,避免任务丢失;
间接 “限流”:调用者线程执行任务时,会阻塞后续任务提交,减少线程池压力。
缺点 :若调用者是主线程(如 Tomcat 的 IO 线程),可能导致主线程阻塞,影响整体响应速度。
3. DiscardPolicy:直接丢弃被拒绝的任务,不做任何处理
行为 :当任务被拒绝时,直接丢弃该任务,既不执行也不抛出异常(“默默丢弃”)。源码 :
1
2
3
4
5
public static class DiscardPolicy implements RejectedExecutionHandler {
适用场景 :任务无关紧要,允许丢失的场景(如日志收集、统计上报等非核心任务)。缺点 :任务丢失后无法感知,可能隐藏问题。
4. DiscardOldestPolicy:丢弃队列中最旧的任务,再尝试提交新任务
行为 :当任务被拒绝时,先丢弃任务队列中最早进入的任务(队头任务),然后重新尝试提交当前被拒绝的任务。源码 :
1
2
3
4
5
6
7
8
public static class DiscardOldestPolicy implements RejectedExecutionHandler {
适用场景 :新任务比旧任务更重要的场景(如实时数据处理,旧数据过期后无意义)。注意 :若队列是优先级队列(如 PriorityBlockingQueue),“最旧任务” 是指优先级最高的任务,可能导致高优先级任务被丢弃,需谨慎使用。
3.自定义拒绝策略 内置策略无法满足需求时,可通过实现 RejectedExecutionHandler 接口自定义拒绝逻辑(如记录日志、持久化任务到数据库 / 消息队列,后续重试)。
示例 :拒绝任务时记录日志,并将任务保存到本地文件:
1
2
3
4
5
6
7
8
9
10
11
12
13
14
15
16
17
18
19
class CustomRejectPolicy implements RejectedExecutionHandler {
4.拒绝策略的选择建议
策略类型
核心特点
适用场景
风险点
AbortPolicy
抛异常,明确感知拒绝
核心业务,不允许任务丢失
中断提交流程,可能影响上游
CallerRunsPolicy
调用者执行,限流保护
并发量小、任务执行快的非核心业务
可能阻塞调用者线程
DiscardPolicy
默默丢弃,无感知
任务可丢失的非核心场景(如日志)
任务丢失无法追溯
DiscardOldestPolicy
丢弃旧任务,保留新任务
新任务优先级高于旧任务(如实时数据)
可能丢弃高优先级旧任务(队列是优先级队列时)
自定义策略
灵活处理(日志、持久化等)
需任务可重试、需追溯拒绝原因的场景
实现复杂,需考虑性能(如 IO 操作)
总结 拒绝策略是线程池的 “最后一道防线”,其设计目的是在系统过载时平衡 “任务处理” 和 “资源保护”。实际开发中需根据业务对任务的 “重要性”“可丢失性”“实时性” 选择合适的策略,核心业务推荐 AbortPolicy 或自定义策略(确保任务不丢失),非核心业务可选择 DiscardPolicy 或 CallerRunsPolicy。